
Meta Ads provide businesses with direct advertising access to over 3 billion monthly active users across the Facebook, Instagram, Messenger, and WhatsApp ecosystems. Executing a profitable lead generation strategy on Meta requires balancing low-friction data capture methods, such as Instant Forms, with high-intent qualification techniques powered by Artificial Intelligence (AI). The modern Meta Ads algorithm demands precise data inputs from advertisers to function efficiently.
Core Strategies for Meta Ads Lead Generation:
- Algorithmic Targeting: Utilizing Broad Audiences to feed the AI, Custom Audiences for bottom-funnel retargeting, and Lookalike Audiences to scale profitable customer profiles.
- Technical Tracking: Simultaneously installing the Meta Pixel and the Conversions API (CAPI) to ensure data accuracy against browser privacy restrictions.
- Campaign Setup: Strategically choosing between native Instant Forms for maximum lead volume or dedicated Website Conversions for higher-intent prospect filtering.
- Creative Intelligence: Deploying short-form, mobile-first video creatives and continuously testing variations to isolate the lowest Cost Per Lead (CPL).
- Form Optimization: Designing lead capture forms with minimal manual entry fields, utilizing conditional logic, and customizing post-submission screens to drive secondary actions.
Maximizing Meta Ads ROI requires businesses to focus entirely on lead quality by integrating CRM data directly into the ad platform. Executing automated, multi-channel follow-ups within minutes of lead capture is mandatory for converting digital prospects into retained customers.
Video Guide: Master Meta Ads Lead Generation (2026 Course)
sbb-itb-d8a1e45
Structuring a Technical Meta Ads Lead Campaign
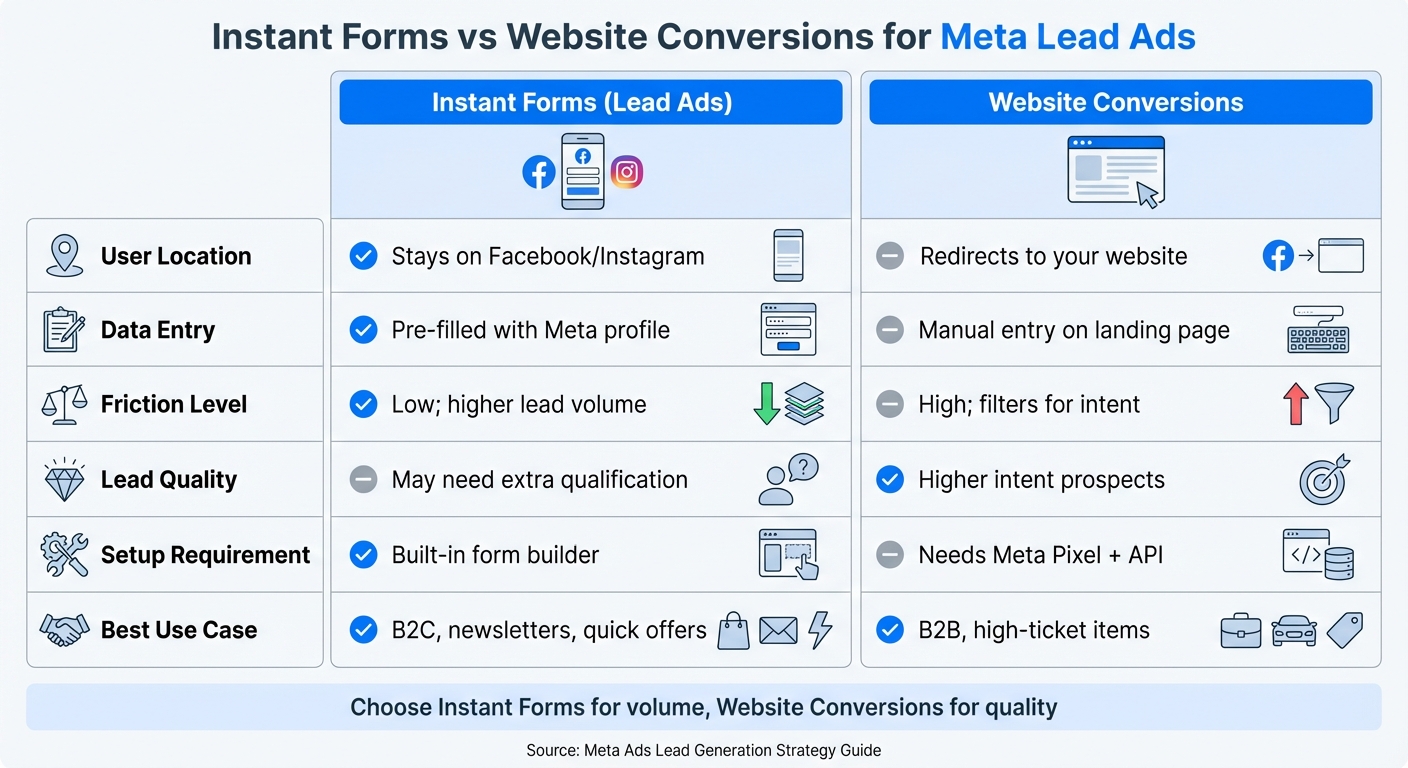
Meta Ads Instant Forms vs Website Conversions Comparison
Launching a profitable Meta Ads campaign begins with establishing a flawless technical infrastructure. Verifying domain ownership, configuring dual-tracking methods, and mapping CRM data correctly are prerequisites for allowing the algorithm to optimize for high-quality prospects.
Configuring Meta Business Suite and Domain Verification
Meta Business Suite configuration requires advertisers to formally link their Facebook Page, Instagram account, and primary domain within the Business Settings portal. Verifying domain ownership is a mandatory step for tracking conversion events from users operating on iOS 14.5+ devices. Marketers must build campaigns using the "Leads" objective to instruct the algorithm to target users historically prone to submitting contact information.
Ad Set configuration requires selecting a specific "Conversion Location." Advertisers select "Instant Forms" to keep the user entirely within the Meta ecosystem, or "Website" to force a redirect to an external landing page. Accounts integrated with a CRM should utilize the "Conversion Leads" optimization goal rather than standard "Leads," directing the AI to pursue high-intent prospects over cheap, unqualified volume.
| Conversion Feature | Instant Forms (Lead Ads) | Website Landing Pages |
|---|---|---|
| User Experience | Frictionless; user remains on Facebook/IG | High friction; user redirects to external URL |
| Data Entry Method | Auto-filled using native Meta profile data | Manual typing required by user |
| Expected Lead Volume | High volume; lower CPA | Lower volume; higher CPA |
| Expected Lead Quality | Requires aggressive sales qualification | High intent; self-qualified prospects |
| Technical Requirement | Native form builder; Privacy Policy URL | Meta Pixel + Conversions API (CAPI) |
Deploying the Meta Pixel and Advanced Matching
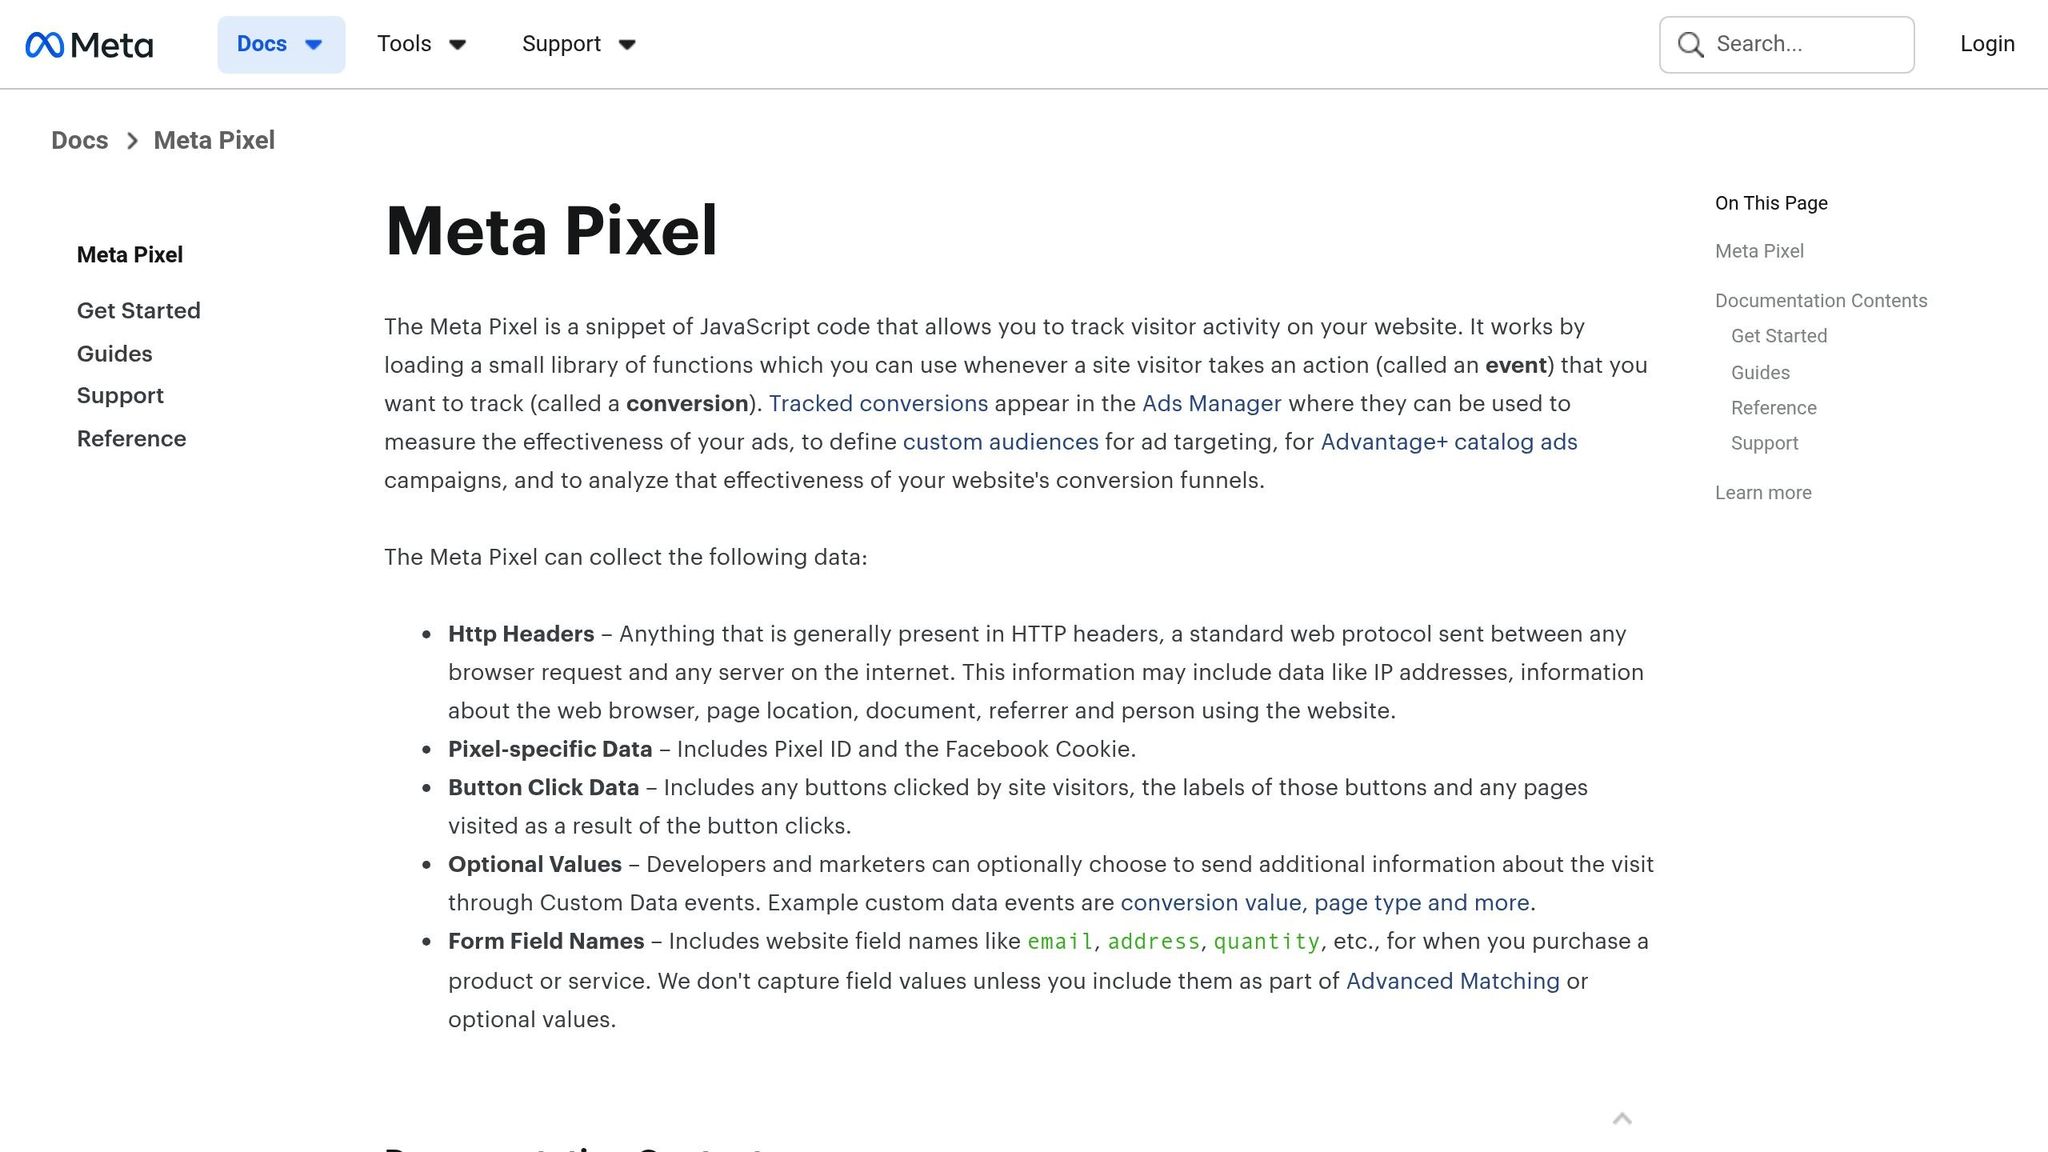
The Meta Pixel is a required JavaScript snippet that tracks user behavior across an external website, facilitating conversion measurement and audience retargeting. Advertisers generate this tracking code within the Meta Events Manager and deploy it globally across the website’s <head> section, typically utilizing Google Tag Manager for streamlined installation.
Enabling Automatic Advanced Matching within the pixel settings is critical for modern tracking. This feature securely hashes customer data (such as emails and phone numbers) submitted on the website and matches it against Meta’s user database, significantly improving conversion attribution accuracy. Advertisers must verify the pixel installation using the Meta Pixel Helper Chrome extension before launching ad spend.
Integrating CRM Data and the Conversions API (CAPI)
Meta officially mandates the deployment of the Conversions API (CAPI) alongside the traditional browser pixel. CAPI transmits server-side conversion data directly to Meta, effectively bypassing data loss caused by iOS privacy protocols and browser-level ad blockers. Combining CAPI with CRM integration establishes a bi-directional data flow: downloading leads instantly to the sales team while simultaneously pushing offline conversion statuses back to the Meta algorithm.
The Meta Lead ID (a unique 15–17 digit string) is the primary identifier used to track a prospect's journey. By utilizing tools like Zapier or Leadsbridge, advertisers can automatically push funnel stages (e.g., "Qualified Lead" or "Closed Sale") back to Meta. Accounts generating over 250 leads per month utilize this CRM data to activate the "Conversion Leads" performance goal, training the AI exclusively on closed revenue rather than raw lead volume.
"The CAPI for CRM integration is not a requirement to begin running campaigns with the Conversion Leads performance goal, however you will see better results if it is fully integrated." – Meta Developers
Executing Meta Ads Audience Targeting Strategies
Meta provides three distinct audience frameworks designed to capture prospects across the entire sales funnel. Successful targeting requires balancing the algorithm's need for broad datasets with the business's need for qualified, high-intent prospects.
Leveraging Core Audiences and Broad Targeting
Core Audiences utilize Meta’s proprietary demographic, geographic, and interest-based data. While historically effective, modern media buying heavily favors Advantage+ Audience broad targeting. When utilizing Advantage+, manually entered interests act solely as algorithmic "suggestions" rather than strict parameters. The AI identifies conversion patterns and automatically expands targeting to audiences mathematically proven to convert, frequently resulting in a 25% increase in lead volume without inflating the CPL.
Executing High-Intent Custom Audience Retargeting
Custom Audiences target "warm" prospects who have previously engaged with the brand, yielding significantly higher conversion rates. Marketers must segment website visitors by intent; creating an audience of users who viewed a pricing page or initiated a checkout process is vastly superior to targeting all general homepage visitors. Excluding recent purchasers or existing CRM contacts from prospecting campaigns is a mandatory practice to eliminate wasted ad spend.
Scaling Campaigns via Lookalike Audiences
Lookalike Audiences allow Meta's AI to analyze a "seed list" of existing high-value customers and identify new users with identical behavioral patterns. Supplying a seed list of the top 20% highest Lifetime Value (LTV) customers guarantees the highest quality Lookalike. Generating a 1% Lookalike Audience targets the most strictly matched users, routinely lowering CPA by up to 26% compared to basic interest targeting.
Engineering High-Converting Ad Creative
Ad creative serves as the ultimate targeting tool in an automated Meta environment. The visual asset and ad copy must instantly filter out unqualified users while compelling ideal prospects to take immediate action.
Crafting Benefit-Driven Ad Copy
Primary text must be concise, restricted to 1–3 lines (approximately 125 characters) to prevent mobile truncation. Ad headlines must communicate an explicit, immediate benefit rather than a generic feature. A headline reading "Get 50 Proven Email Templates" drastically outperforms the ambiguous "Improve Your Marketing." Coupling the headline with a definitive Call-to-Action (CTA) button, such as "Download" or "Get Quote," establishes exact user expectations.
Optimizing Visual Formats for Mobile Consumption
Visual assets must be formatted natively for the platform: 4:5 aspect ratios for the main Feed and 9:16 vertical formats for Stories and Reels. Replacing static images with short-form video content (5–15 seconds) routinely increases conversion rates by 17%. Because the vast majority of mobile users consume video with the sound off, embedding burned-in captions and ensuring the primary visual hook occurs within the first 3 seconds is mandatory.
Deploying Scientific Creative Testing
Isolating variables is critical for creative optimization; marketers must test a single headline change against a proven visual asset to determine mathematical significance. Utilizing Ad Set Budget Optimization (ABO) ensures equal budget distribution across creative tests, preventing the algorithm from prematurely favoring a specific ad. Creative assets must run untouched for 3–5 days, aggregating a minimum of 50 optimization events, to allow the learning phase to stabilize.
Maximizing Instant Form Conversion Rates
The native Meta Instant Form is the highest-converting tool for mobile lead generation. Proper form architecture requires minimizing user friction while deploying conditional logic to maintain lead quality.
Strategic Form Field Configuration
Form length inversely correlates with conversion rate. Instant Forms requesting 3 or fewer fields consistently achieve completion rates exceeding 25%, whereas forms exceeding 6 fields routinely drop below 15%. Utilizing Meta's auto-prefill feature injects the user's profile data (name, email) directly into the form, virtually eliminating mobile typing friction. To increase lead quality, advertisers can disable prefill on specific fields, forcing the user to manually type and verify their current phone number.
Designing Intro and Post-Submission Screens
The form's introductory screen must explicitly state the value proposition and establish a clear follow-up timeline (e.g., "Expect a call within 15 minutes"). The "Thank You" screen represents a massive missed opportunity for most advertisers. Instead of a generic dismissal, marketers must utilize this screen to drive secondary actions, such as prompting a direct phone call, offering an immediate PDF download, or directing the user to a calendar booking link.
Campaign Optimization and Algorithmic Stability
Continuous monitoring of specific Key Performance Indicators (KPIs) prevents ad fatigue and ensures campaign budgets are allocated to profitable demographics.
Tracking Primary Lead Generation KPIs
- Cost Per Lead (CPL): The foundational metric calculating total ad spend divided by the volume of captured leads.
- Lead-to-Customer Conversion Rate: The ultimate profitability metric, tracking how many Meta leads transition into closed revenue via CRM data.
- Click-Through Rate (CTR): Evaluates creative resonance; a high CTR coupled with a low form completion rate indicates a misalignment between the ad copy and the form's offer.
- Ad Frequency: Monitors audience saturation; frequencies exceeding 3.0 on cold audiences typically result in ad fatigue and inflated CPAs.
Executing Campaign Budget Optimization (CBO)
Campaign Budget Optimization (CBO) allows the Meta algorithm to distribute capital dynamically to the highest-performing ad sets. Successful CBO deployment requires setting a daily budget equivalent to at least 50 times the target CPA. Once an ad set aggregates 50 conversions, applying a cost cap (set 20% higher than the target CPL) stabilizes efficiency during scaling. Scaling a CBO campaign requires patience; advertisers must restrict budget increases to 20% increments every 48–72 hours to prevent algorithmic shock.
Navigating the Algorithmic Learning Phase
The Meta algorithm requires 50 conversion events within a 7-day window to successfully exit the "Learning Phase" and stabilize CPA costs. Executing "significant edits"—such as modifying audience targeting, altering creative assets, or increasing budgets by more than 20%—instantly resets this learning phase. Marketers must batch optimizations together to minimize disruptions, as resetting the algorithm guarantees 3–5 days of volatile, inflated CPMs.
Multi-Channel Follow-Up and Retargeting
Capturing a lead on Meta Ads is only the first step in the conversion funnel. With 96% of initial website visitors failing to convert immediately, aggressive retargeting and instantaneous sales follow-up dictate overall campaign ROI.
Structuring Bottom-Funnel Retargeting
Dynamic Product Ads (DPA) utilize the Meta Pixel to serve highly specific advertisements featuring the exact products a user previously viewed. Retargeting campaigns boast conversion rates 3 to 5 times higher than cold prospecting campaigns. Strategic segmentation is required: an audience of "Cart Abandoners (Last 3 Days)" must receive more aggressive bidding and urgency-based copy ("Items Selling Fast") compared to a broader audience of "Page Viewers (Last 60 Days)."
Executing Automated Speed-to-Lead Follow-Up
Speed-to-lead dictates sales conversion rates; contacting a Meta lead within 5 minutes yields a 21% close rate, whereas waiting 24 hours drops the close rate below 1%. Integrating CRM webhooks to trigger immediate SMS and email sequences is mandatory. SMS marketing boasts a 98% open rate, making it the premier channel for immediate lead engagement. Because 80% of sales require 5 to 12 follow-up attempts, implementing automated multi-channel nurturing sequences ensures maximum pipeline monetization.
Conclusion: Scaling Meta Ads Lead Generation
Mastering Meta Ads lead generation in 2026 demands a perfect synthesis of algorithmic targeting, technical tracking, and aggressive CRM follow-up. Transitioning from traditional browser pixels to the server-side Conversions API (CAPI) is the non-negotiable foundation for measuring true campaign success. By leveraging the "Conversion Leads" optimization goal, advertisers force the AI to pursue verified revenue rather than superficial lead volume.
The creative asset is now the primary targeting lever. Marketers must consistently test short-form video formats, vertical aspect ratios, and benefit-driven headlines to isolate the lowest CPL. Optimizing Instant Forms by minimizing input fields and utilizing conditional logic drastically reduces friction for mobile users.
"Meta doesn't send bad leads. It sends the leads defined by your campaign setup."
– respond.io
Ultimately, Meta advertising is an acquisition engine, not a sales closer. Integrating automated SMS and email follow-up within minutes of lead capture is what transforms a digital click into a profitable customer relationship.
Meta Ads Lead Generation FAQs
When should I use Instant Forms vs. a Website Landing Page?
Use Instant Forms when the primary objective is maximizing total lead volume at the lowest possible CPL, particularly for top-of-funnel offers like newsletter sign-ups or PDF downloads. Instant Forms reduce mobile friction via auto-prefill capabilities. Use Website Landing Pages when targeting high-ticket B2B or complex service sales, where the friction of an external site acts as a necessary filter to eliminate unqualified, low-intent prospects.
What is the minimum setup required for reliable Meta tracking?
A reliable 2026 tracking architecture requires three simultaneous components: The Meta Pixel deployed on the website via GTM for client-side tracking, the Conversions API (CAPI) deployed server-side to bypass ad-blockers, and a CRM Integration pushing offline funnel stages (e.g., "Contract Signed") back to the Meta Events Manager using a unique Event ID for deduplication.
How do I improve Meta lead quality without increasing CPL?
Improving lead quality requires utilizing the "Higher Intent" Instant Form setting, which forces the user to review their pre-filled information before submission. Additionally, implementing Custom Questions or conditional logic acts as an immediate filter for unqualified prospects. On the backend, activating the "Conversion Leads" performance goal instructs the AI to bid exclusively on users who share data profiles with your previously closed CRM deals.
0 comments